Snowman Marshmallow Pops – Quick and Adorable Holiday Treats

This post contains affiliate links. I only recommend products I use and love. Read the full disclosure here
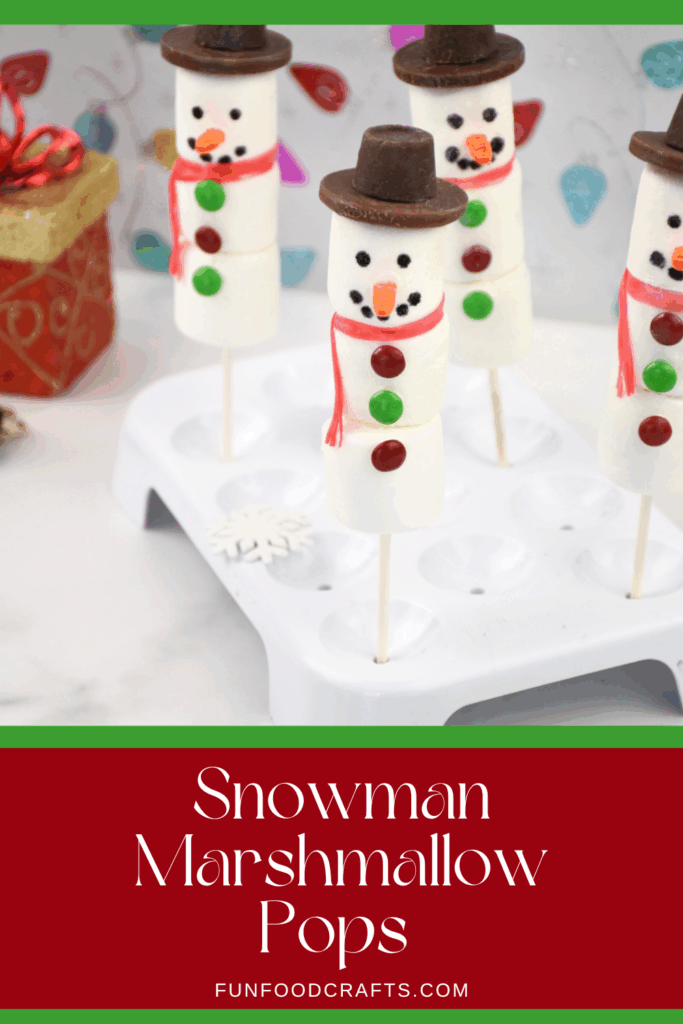
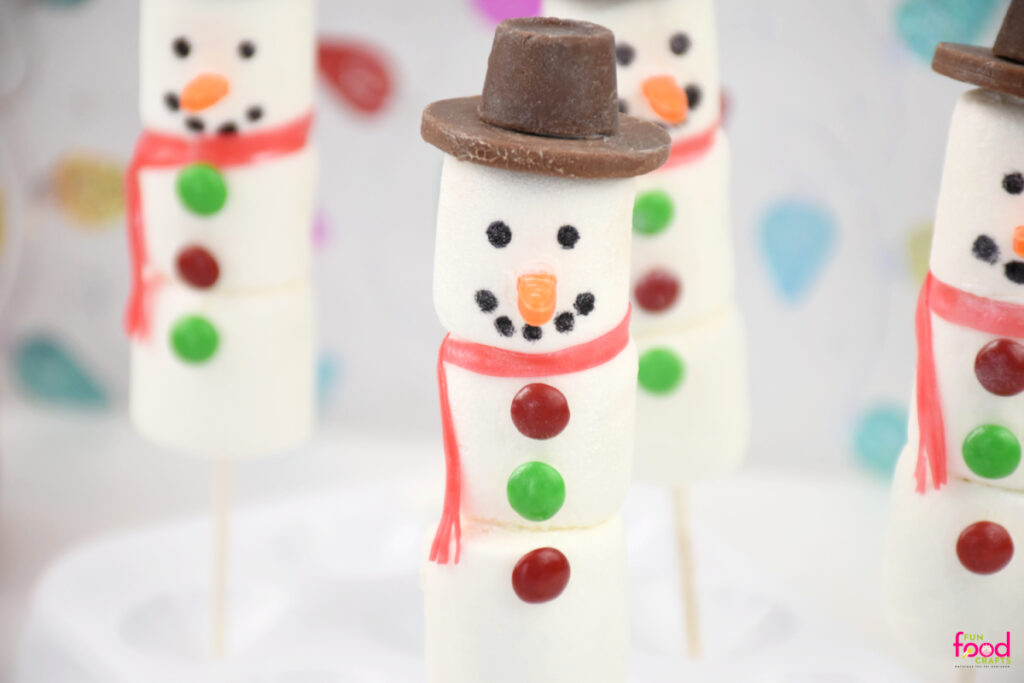
Snowman Marshmallow Pops bring instant winter cheer, turning simple marshmallows into the cutest little frosty friends. These quick holiday treats come together fast and always earn a happy grin.
Holiday treats that look like a craft project in the best possible way are my absolute favorite. And these Snowman Marshmallow Pops deliver all the winter magic without any of the freezing temperatures. They’re bright, cheerful, kid-approved, and the perfect thing to make when you want a snack that earns instant smiles at parties, school events, or cozy movie nights.
Better yet, they’re super simple to build! Once you stack the marshmallows and add that tiny Rolo hat and scarf, they suddenly look like they walked right out of a snowy little storybook scene. Add a sprinkle of edible glitter, and it’s like giving your snowman a frosty twinkle.
Watch how I made them on TikTok @FunFoodCrafts
Reasons You’ll Love This Recipe
How to Make Snowman Marshmallow Pops
These snowy cuties come together quickly and look absolutely adorable from every angle.
🥄 Kitchen Tools You’ll Need
- Skewers
- Microwave-safe bowl for melting chocolate
- Food-safe paintbrush
- Black Food marker
- Scissors for cutting scarves

Ingredients You’ll Need
Get everything ready so your snowman assembly line runs smoothly.
- Marshmallows
- Fruit by the Foot strips cut into tiny scarves
- Rolós
- Mini Oreos
- Black food marker
- Carrot sprinkles
- Mini M&Ms
- White edible glitter
- A little melted candy melts for attaching the hat and securing the skewer
Step-by-Step Instructions
This is one of those treats that looks like magic but takes only minutes to pull together.
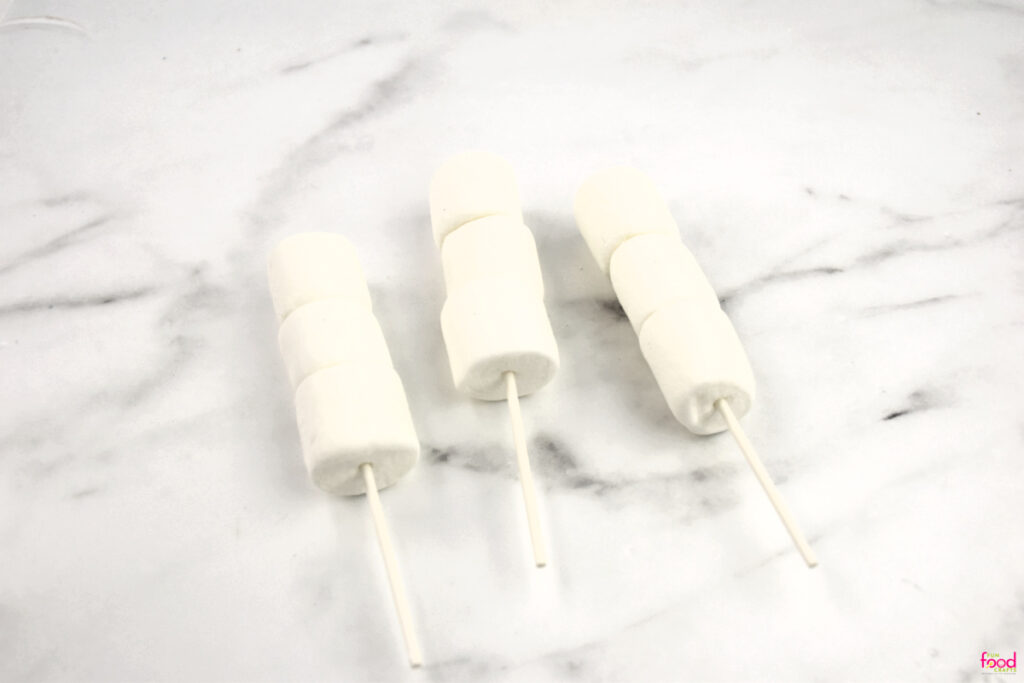
Step 1: Prep the Stick
- Dip the very tip of the stick into melted candy melts. This helps it slide through the marshmallows without tearing. You can redip between marshmallows if needed.
- Slide on your first marshmallow, then add a tiny dab of melted candy to its top before adding the next one.
- Add the second marshmallow, again adding candy melt to the top so all three marshmallows stay snug, secure, and perfectly stacked.
- Add the last marshmallow
Pro Tip – Wiggle the skewer gently while pushing through the marshmallows to keep them from cracking. And glitter always goes on before the face, so nothing smears.

Step 2: Make the Scarf
- Cut a strip of the Fruit Roll-Up long enough to be able to wrap it around the snowman’s neck and cross over in front.
- Snip tiny fringe lines into the ends for a cute scarf detail.
- Use tiny dabs of candy melt as glue to attach it to the marshmallow snowman.

Step 3: Build the Hat
- Attach a Rolo to a chocolate coin with a small dab of melted chocolate.
- Place it to the side to set while you move on ot the next steps. It’s best to prop them up as the hat sets. A cake pop stand makes this a lot easier, but you can also use a piece of thick styrofoam or even a cup filled with rice works just as well.

Step 4: Add Buttons
- Using dabs of candy melt as glue, add 3 mini M&Ms to create colorful snowman buttons.

Step 5: Add the Face
- Use a black food marker to dot on eyes and a smile.
- Then add your orange sprinkle carrot nose right in the center.

Step 6: Attach the Hat and Scarf
- Using tiny dabs of melted chooclate, attach the scarf. Start at the back side of the snowman and wrap the scarf around its body, making sure to cross it over itself in the front.
- Next, againusing melted chocolate, careful place the hat on the snowman’s head. Hold it in place until it can stick on its own.
- Then allow the candy to solidify for at least 5 minutyes before the next step.

Step 7: Add Shimmer
- Lastly, use a food-safe paintbrush, paint a little edible shimmer dust/glitter over the marshmallows to give your snowman a frosty shimmer.
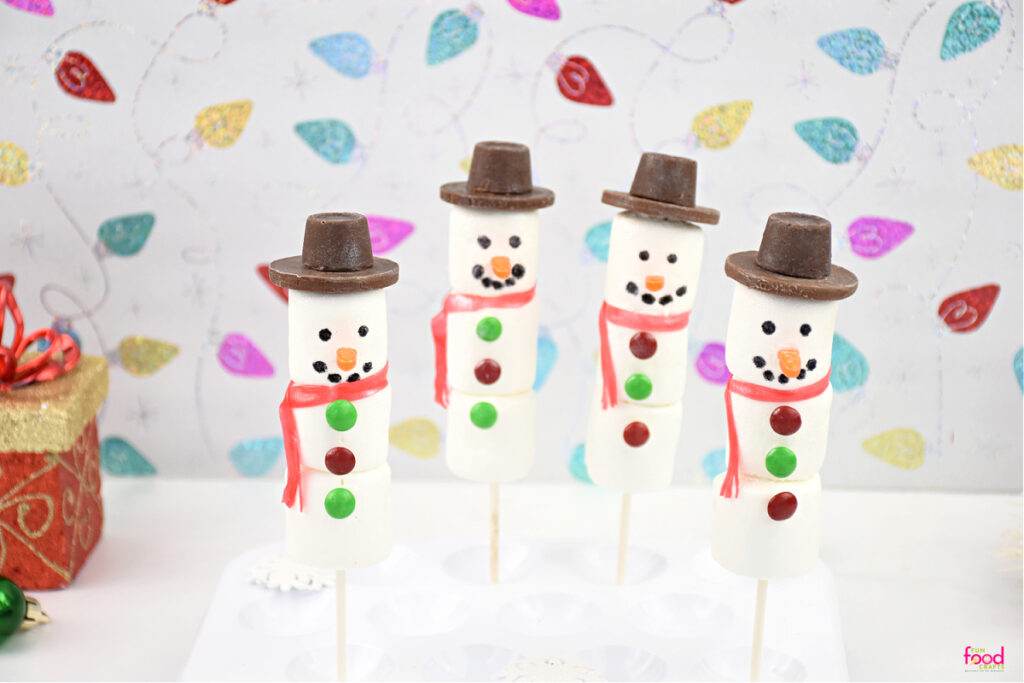
And that’s it, your sparkly little snowmen are ready to parade across the dessert table!

Recipe Tips
- Use fresh marshmallows for the fluffiest, smoothest look.
- Press the hat on for a few seconds so it stays perfectly centered.
- Make a whole little snowman family by using different scarf colors.
Show Me Your Snowman Squad
If you make these Snowman Marshmallow Pops, I want to see your whole frosty crew. Tag me on Instagram or TikTok @FunFoodCrafts so I can share your creations and cheer them on.
More Holiday Fun Food Crafts You’ll Love
Find even more winter treats at BullocksBuzz.com!
Printable Recipe Card
Easy Snowman Marshmallow Pops

Glittery marshmallow snowmen stacked on a skewer with Rolo hats, Fruit by the Foot scarves, candy buttons, and a sprinkle carrot nose. A magical winter treat.
Ingredients
- 9 Large Marshmallows
- 1 Fruit by the Foot
- 3 Rolós
- 3 Mini Oreos
- Black food marker
- 3 Orange sprinkle carrot - or orange jimmies or orange Mini M&Ms cut in half
- 9 Mini M&Ms - 3 per snowman marshmallow pop
- White edible glitter
- Candy melts for attaching pieces - white
- Lollipop Sticks
Instructions
- Dip the very tip of the stick into melted candy melts. This helps it slide through the marshmallows without tearing. You can redip between marshmallows if needed.
- Slide on your first marshmallow, then add a tiny dab of melted candy to its top before adding the next one. Add the second marshmallow, again adding candy melt to the top so all three marshmallows stay snug, secure, and perfectly stacked. Then, add the last marshmallow.
- Make the hat by attaching a Rolo to the top of a Mini Oreo using candy melt as glue. Once set, use a dab of candy melt to attach the hat to the top of the snowman's head.
- To make the face, use a black food-safe marker to draw two dots for the eyes and 4 or so dots for the smile. Use a dab of candy melt to attach a carrot sprinkle right between the nose and eyes. Allow to set.
- For the scarf, cut a strip of Fruit by the Foot long enough to wrap around the snowman’s neck and cross over itself in the front. Snip tiny fringe lines into the ends for the cutest scarf moment. Then use dabs of candy melt to securely attach it to the snowman marshmallow pop.
- Using dabs of candy melt, attach 3 mini M&M for colorful snowman buttons. mini M&Ms as colorful buttons.
- Using a food-safe paintbrush, brush a little edible glitter over the marshmallows to give your snowman a frosty shimmer.
Nutrition Information:
Yield:
3Serving Size:
1Amount Per Serving: Calories: 1660Total Fat: 58gSaturated Fat: 36gUnsaturated Fat: 22gCholesterol: 27mgSodium: 825mgCarbohydrates: 276gFiber: 3gSugar: 219gProtein: 13g